You need hosting that’s fast, reliable, and always online to keep visitors engaged and protect your SEO rankings—all without the headache of downtime.
That’s why countless site owners decide to migrate your website to 7xHost, enjoying enterprise‑grade performance and rock‑solid stability.
Follow a straightforward, step‑by‑step roadmap to seamless, zero‑stress migration, ensuring faster page loads, enhanced security, and 24/7 expert support.
Focus on growing your site while 7xHost handles the heavy lifting of server management and uptime.
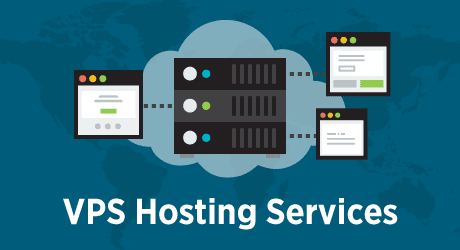
Why Migrate Your Website to 7xHost?
Moving your site can feel scary.
But when you migrate your website to 7xHost, you unlock:
-
Blazing Speed
SSD storage combined with a global CDN slashes load times, keeping visitors engaged. -
Unwavering Uptime
A 99.9% SLA ensures your site stays live, so you never miss a lead or sale. -
Effortless Scalability
Upgrade plans instantly as traffic surges—no downtime, no technical headaches. -
Unified Control Panel
Manage domains, performance metrics, backups, and email accounts from one intuitive dashboard. -
Built‑In Security & Backups
Free SSL certificates plus automated daily backups safeguard your data by default. -
Professional Email
Receive up to three branded addresses for trustworthy client communication.
Transitioning improves SEO, user experience, and conversion rates.
It’s worth the effort.
Pre‑Migration Preparation
Before you migrate your website to 7xHost, get organized:
-
Audit Your Site
-
List plugins, themes, and custom code.
-
Note PHP versions and server settings.
-
-
Create a Full Backup
-
Use plugins (UpdraftPlus, Duplicator) or cPanel’s backup tool.
-
Download both files and the database archives.
-
-
Review DNS Settings
-
Check TTL values for quick switching.
-
Record current nameserver entries.
-
These steps prevent surprises and data loss.
How to Migrate Your Website to 7xHost
Step 1: Sign Up and Configure 7xHost Account
First, migrate your website to 7xHost by creating an account:
-
Choose a plan matching your traffic and storage needs.
-
Complete registration with billing and domain info.
-
Log in to the 7xHost dashboard and open cPanel (or Plesk).
Next, verify your account via email. Then, note your control panel credentials.
Step 2: Upload Website Files via FTP/SFTP
Now it’s time to migrate your website to 7xHost storage:
-
Open FileZilla (or your preferred FTP client).
-
Enter your 7xHost FTP credentials (host, user, pass, port 21/22).
-
Connect and navigate to
public_html(or root folder). -
Drag and drop your local site files into the server directory.
Tip: Enable SFTP for encrypted transfers. Keep a log of transferred files.
Step 3: Import Your Database
Your database powers dynamic content
To migrate your website to 7xHost, you need to restore it:
-
Log in to cPanel and open phpMyAdmin.
-
Select your new database (or create one).
-
Click Import, choose your
.sqlbackup file, and run. -
Verify that tables populate correctly.
If your database is large, use the CLI:
Step 4: Update Configuration Files
Next, point your site at the new database:
-
Edit
wp-config.phpor equivalent. -
Replace DB_NAME, DB_USER, DB_PASSWORD, DB_HOST with 7xHost values.
-
Save and upload the updated config file.
Then, set file permissions:
-
Folders →
755 -
Files →
644
This ensures security and avoids 500 errors.
Step 5: Test on a Temporary URL
Before you switch DNS, preview your site:
-
In cPanel, find Temporary URL or Preview Domain.
-
Alternatively, edit your local hosts file:
-
Visit
http://yourdomain.comto verify functionality.
Check:
-
Links and menus
-
Forms and logins
-
Mobile responsiveness
Fix any errors before going live.
Step 6: Switch DNS and SSL Setup
Time to go live.
To migrate your website to 7xHost, update the DNS:
-
Log in to your domain registrar.
-
Change nameservers to those provided by 7xHost.
-
Or update the A‑record to point at your new server IP.
Expect propagation in 1–4 hours (up to 24).
While waiting:
-
Install SSL via Let’s Encrypt in cPanel.
-
Force HTTPS in your config or
.htaccess.
Use SSL tests (e.g., SSL Labs) to confirm.
Step 7: Final Checks and Post‑Migration Tasks
Congratulations—you’ve migrated your website to 7xHost live.
Now optimize and monitor:
-
Submit Sitemap:
-
In Google Search Console, add your site, and submit
sitemap.xml.
-
-
Enable Caching & CDN:
-
Activate caching plugin (e.g., WP Rocket).
-
Turn on 7xHost CDN in the dashboard.
-
-
Monitor Performance:
-
Use UptimeRobot for alerts.
-
Check page speed with Lighthouse or GTmetrix.
-
Finally, schedule regular backups and updates.
Troubleshooting Common Issues
Even the best migrations hit bumps.
Here’s how to solve them quickly:
-
500 Internal Server Error
-
Check error logs in cPanel.
-
Verify file permissions and
php.inisettings.
-
-
Database Connection Errors
-
Reconfirm credentials in your config file.
-
Ensure the database user has proper privileges.
-
-
Mixed‑Content Warnings
-
Update old HTTP URLs to HTTPS.
-
Use a plugin (Really Simple SSL) or run a database search/replace.
-